

A good clean shave can start your day off right. Unfortunately, improper shaving has nasty side effect: razor burn, razor bumps, whatever you call them, the fact is, they can take kick you A-game right out the window. It's the horrible itchy feeling that pops up which not only ruins a good shave, it looks horrendous. But the proper execution plan, can keep future razor burn / razor bumps at bay.
What are razor bumps?
Razor bumps are ingrown hairs that cause inflammation to the skin. It's medical term is pseudofolliculitis barbae, freshly shaved
hairs curl back into the skin, triggering a response of your immune
system. This produces the
inflammatory reaction resulting in red, irritated bumps. Thankfully there are methods to prevent your face and neck from producing these unsightly skin reactions.
Step 1
Soften the beard. A soft beard can be removed easily. So make sure to shave is after you take a hot shower. The beard will be softened by the hot steam, achieving the prime condition for shaving. If you want to one up it, take some hair conditioner and rub it on
your beard during your shower (If you find that this causes breakouts stop immediately). Leave the conditioner in for the duration of
the shower and rinse before shaving.

Step 2
Exfoliate. Girlfriends know how important a good exfoliation is. If your not doing this yet, start. It helps to
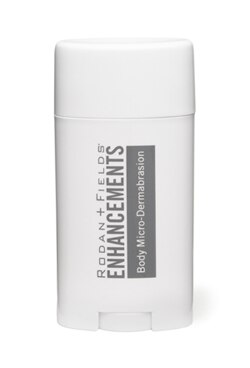
remove dead skin cells and brings potential ingrown hairs to the surface. I’m a fan of ENHANCEMENTS Body Micro-Dermabrasion Bar. It’s inexpensive, easy to handle and can be used on other parts of your body where blackheads might be an issue.
Step 3
Use a badger brush. These old school badger brushes aren't only for your grandpa. Using one of these helps get the
shaving cream up under the whiskers which results in a better, smoother
shave.

Step 4

Use a sharp razor. Have you ever seen a dull bald cut a ripe tomato? It tears the tomato, just like a dull blade can tear up your face. Using a dull blade will create jagged
whiskers, increases your chances of forming ingrown hairs and causing skin
irritation. The benefit of using a safety razor is that you can
change you old blades frequently and it won’t cost you an arm and a leg. Each
blade is roughly $.25.
Step 5
Shave with the grain. In an attempts to get that
surface smooth as a baby's behind, many men shave against the grain. A shave that is too close will increases the chances for ingrown hairs and tear the skin on your face. Instead, shave with the grain, which will reduce the chances of skin
irritation. Although you will not be able to shave cleanly with just one pass with this safer method, making several passes with the grain
is much better than making one pass against the grain.

Use light, short strokes. Too much pressure with your stokes will increase your chances for razor burn. Be assured that the weight of the razor is sufficient to cut your beard. Keep yourself from applying too much pressure by using short strokes. Longer strokes, tend to prompt more pressure to the razor.
Step 6
Step 7

Step 8
Dry with a CLEAN towel. Make sure that the next thing you put on your face is free of bacteria, dirt, and oils. Pat - I'll say it again - Pat dry your fresh face with a clean towel to avoid the risk of applying irritation-causing bacteria, or any other foreign matter, from getting into your exposed pores.

Step 9
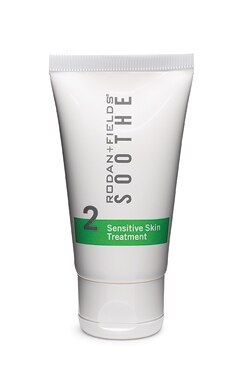
Apply a calming balm. No matter how clean your shave was, you've just scraped a piece of sharp metal across your skin, your face is bound to be a little unhappy. Aftershaves can sometimes even add to the irritation. Instead of a smelly liquid, apply a relaxing balm such as SOOTHE Sensitive Skin Treatment. This balm is well... "the bomb" and can also be used on any area with irritated skin and inflammation. I especially like to keep it handy for calming sudden rashes and allergic reactions.
Step 10


Related Posts
The Guys Recreate Kim Kardashian's Butt Photo
8 Of The Worst Foods For Your Skin
The Anti-Aging Eye Routine
SHARE this page with friends!

This comment has been removed by a blog administrator.
ReplyDeleteThese are truly great tips about razor bumps.
ReplyDeletehome remedies for diaper rash